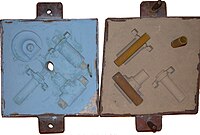
Sand molding

Okay kiddo, so have you ever played with sand at the beach? You know how we can make all sorts of shapes and castles with the sand using our hands and shovels? Well, sand molding is kind of like that!
Only instead of just playing around, we use sand and different tools to make a mold, or a special shape that we can use to pour liquid metal or other materials into. This way, we can make all sorts of things like car parts, toys, and even statues!
Now, making a sand mold can be a little tricky, but don't worry, I'll explain it to you step by step.
First, we need some sand, some special binding material, and a pattern, which is like a template or model of what we want to create.
Then, we put the pattern into the sand and press it down so it makes an impression in the sand. This is when the binding material comes in - it helps the sand stick together and hold its shape.
Next, we carefully remove the pattern and make any necessary adjustments to the sand mold. This is important because we want the mold to be just the right shape and size for what we're making.
Now, it's time to pour the liquid metal into the mold! This part can be a bit dangerous, so we have to be very careful. We wear protective gear, like gloves and goggles, and pour the metal slowly and steadily into the mold.
Finally, we wait for the metal to cool and harden, and carefully remove the sand to reveal the finished product!
So, there you have it, kiddo - sand molding is like playing with sand at the beach, but with a specific purpose and using different materials. It's a really cool way to make all sorts of things out of metal and other materials!
Related topics others have asked about:
